Learn Microsoft Excel step by step with practical examples. No payment. No registration. 100% free.
Thursday, 18 June 2020
Tuesday, 2 June 2020
How to use Orientation in Excel VBA
In this blog post, you will learn about “How to apply
Orientation in Excel VBA”.
First of all, we need to know what is Orientation in
Excel, so ‘Orientation’ is nothing but “aligning or rotating our text data in a
cell”.
See the image below:-
See in the above image, our text data is rotating in 4
different direction.
In this post, you will learn more VBA option to rotate or align
our text data.
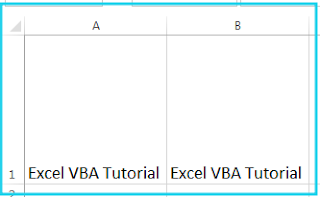
I am using the below image as the text data:-
Our first option to rotate the text data from bottom to
upward.
Option 01:- xlUpward
Option 02:- xlDownward
This code will rotate our text data from upward to downward
Option 03:- xlVertical
Option 04:- xlHorizontal
Code: - Range ("A1:B1").Orientation = xlHorizontal
Option 05:- Orientation = 30 (Degree)
Code: - Range
("A1:B1").Orientation = 30
Option 06:- Orientation = 60 (Degree)
This code will rotate our text data up to a 60-degree angle.
Code: - Range
("A1:B1").Orientation = 60
Option 07:- Orientation = 90 (Degree)
Code: - Range
("A1:B1").Orientation = 90
Option 08:- Orientation = -90 (Degree)
This code
will rotate our text data up to (-90) degree angle.
Code: - Range ("A1:B1").Orientation = -90
Option 09:- Orientation = 0 (Degree)
This code
will rotate our text data up to (0) degree or Horizontal.
Code: - Range ("A1:B1").Orientation = 0
I hope you like this post.
Please feel free to put your comments below.
Regards
How to Change Font Color in Excel VBA
How to Change the Background Color in Excel VBA
Easiest Way to Copy and Paste Data in Excel VBA
How to Apply Border Style and Thickness in Excel VBA
About Me
Featured post
Pivot Tables
Pivot Tables are one of the most useful tool in excel, and most excel experts says that this tool is the magic tool for quickly prepar...
-
In this blog post, you will learn about “How to apply Orientation in Excel VBA”. In this blog post, you will learn about “How to apply Orien...
-
In this blog post, you will learn about CurrentRegion Property in Excel VBA. CurrentRegion Property is useful when our dataset is continuous...


